4th of July, Friend’s birthday weekend, Chinese breads…Weight gain?

First off, I have to apologize for my lack of entries…I’ve been having to wake up very early and have also been coming home late lately, so I haven’t really had the time or energy to post entries like I used to 😦

Anyway, here’s a quick recap of the past week:

  • 4th of July, my family went to a Chinese buffet for lunch. As always, I ate quite a fair amount – 5 full plates of food, 1 plate of dessert, and 1 big bowl of ice cream 🙂
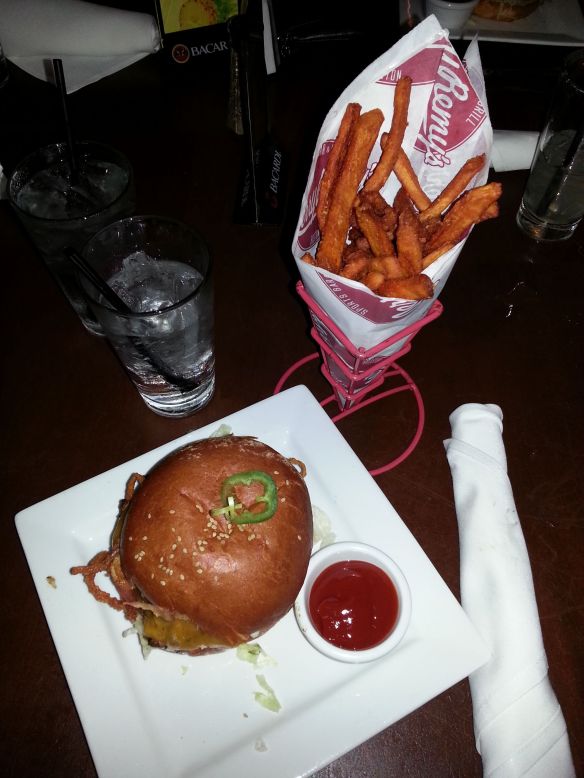
  • I went up to Boston over the weekend to celebrate my friend’s birthday. Honestly don’t even want to know how much alcohol I had, but we went to a sports bar earlier in the evening for dinner and this is what I ordered:

Jalapeno Cheddar Burger (with side of sweet potato fries)

Image

Not the best angle, but you get the idea 😀

Image

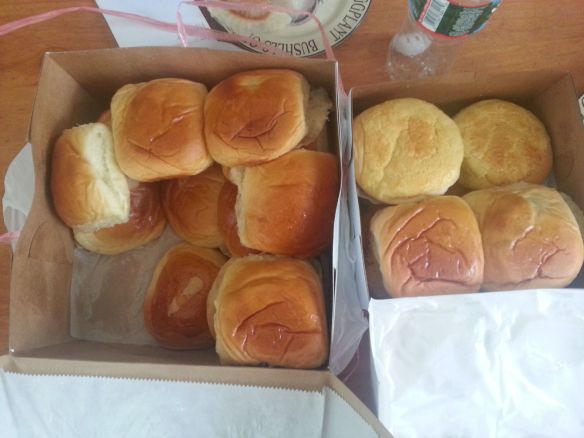
Before coming home, I decided to stop by the Chinatown in Boston and buy some Chinese breads because everyone in my family loves them. I ended up buying 10 of cream, red bean, pork, and curry buns! So good!

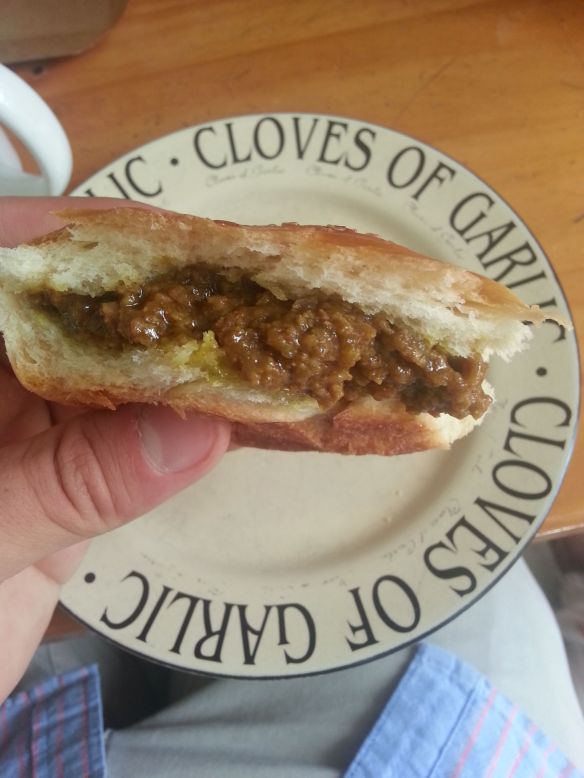
After eating a few already:
Image

So much curry in the bun!
Image

Sunday evening, my dad decided to make corn bread along with some maple butter:

So now that all the foodporn is out of the way, you must be thinking, “Surely, eating and drinking that amount must have come with some consequences?

And without a doubt, it did.

I woke up Monday morning at 207.5 lbs. That’s a 4.5 lbs gain in less than a week!

Of course, I didn’t let that get me down. Instead, I convinced myself that surely, with this newly added weight, I must be able to break a few records. And I did exactly that!

Monday: Upper Body Power
Bench Press:

  • Warm-up: 45lbsx15, 95×5, 135×5, 175×5
  • Set 1: 205×3
  • Set 2: 245×3
  • Set 3: 275×3
  • Set 4: 305×1

Dips (dip belt was broken 😦 ):

  • Set 1: 15
  • Set 2: 15

Push Press:

  • Set 1: 135×5
  • Set 2: 165×5
  • Set 3: 185×5
  • Set 4: 205×3

Bent Over Barbell Rows (Underhand):

  • Warm-up: 225lbsx5
  • Set 1: 275×5
  • Set 2: 295×5
  • Set 3: 295×5

Weighted Chin-ups:

  • Set 1: 12
  • Set 2: 12
  • Set 3: 12

Barbell Curls:

  • Set 1: 95lbsx8
  • Set 2: 95×8
  • Set 3: 95×8

Rope Pushdown:

  • Set 1: 100lbsx10
  • Set 2: 110×8
  • Set 3: 110×8

Tuesday: Lower Body Power
Squats:

  • Warm-up: 45lbsx10, 135×10
  • Set 1: 225×5
  • Set 2: 275×5
  • Set 3: 315×5

Sumo Deadlift:

  • Warm-up: 135lbsx10, 225×5
  • Set 1: 315×5
  • Set 2: 405×3
  • Set 3: 465×3
  • Set 4: 510×2

Barbell Straight Legged Deadlift:

  • Set 1: 225lbs×10
  • Set 2: 245×10
  • Set 3: 245×10

Lying Hamstring Curl:

  • Set 1: 125lbsx12
  • Set 2: 145×10

Seated Leg Extensions:

  • Set 1: 80lbsx10
  • Set 2: 90×10
  • Set 3: 100×10

Hanging Leg Raise:

  • Set 1: 12 reps
  • Set 2: 12 reps
  • Set 3: 12 reps

Cable Crunch:

  • Set 1: 95lbsx15
  • Set 2: 95×15
  • Set 3: 95×15

And best of all?
I’m back to my original weight of 204 lbs! 😀

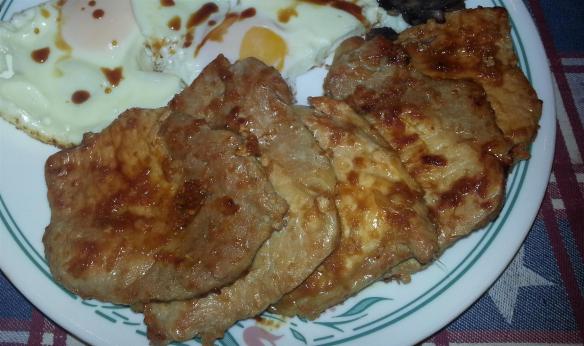
Rest Day Recipes – Grilled Ginger Pork

Image

“Buta no Shogayaki” (Buta = pork, Shogayaki = ginger grilled) is a very popular dish served in Japanese families and is enjoyed in Japanese restaurants all over the world.

Not only does it taste great, but it’s also unbelievably easy to prepare! And best of all, it’s very diet friendly! 😀

What you will need:

  • 500g thinly sliced pork
  • 2 tbsp grated fresh ginger
  • 1 tbsp sake
  • 2 tbsp soy sauce

Directions:

  1. Mix the sake, soy sauce, and ginger in a bowl
  2. Leave the pork slices to marinade for an hour or two
  3. Heat 1 tbsp of oil in a frying pan and cook the pork slices

THAT’S IT!!

It’s almost unreal how easy it is to make, right? Almost feels like a scam that restaurants would charge so much for a meal that takes literally 5 minutes to make.

If you’d like, you can also add 1/2 – 1 tablespoon of sugar to the above recipe, but I personally prefer having a bit of a kick from the ginger 🙂

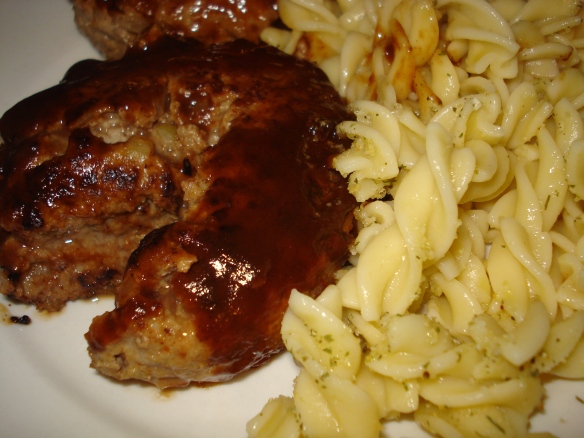
Rest Day Recipes – Japanese-Style Hamburger

Image

In one of my earlier entries, you would have seen my Japanese-style Hamburgers (it’s actually “Hambaagu”, to be precise). The only commonality between your typical hamburgers and these Japanese “Hambaagus” is that they both start off with ground beef. In a sense, the Japanese Hambaagus are closer to a meatloaf.

This is one of my go-to foods on my rest days as I aim to get in a good amount of protein and fats. They are not only very filling, but they are very tasty as well! For those of you who are fans of meatloaves, I highly recommend you give these a go 🙂

What you will need:

  • 200g ground beef – 428 calories (54g protein, 22g fat, 0g carb)
  • 30 mL low-fat milk – 15 calories (1.08g protein, 0.45g fat, 1.59g carb)
  • 25g panko (or breadcrumbs) – 90.75 calories (3.23g protein, 1.08g fat, 16.85g carb)
  • ½ onion (chopped) – 28 calories (1g protein, 0g fat, 7g carb)
  • 22.18 ml tomato sauce = 23.5 calories (0.26g protein, 0g fat, 5.3g carb)
  • 22.18 ml Worcestershire sauce = 16.7 calories (0g protein, 0g fat, 4.72 carb)
  • 2 tsp olive oil = 80 calories (0g protein, 10 fat, 0g carb)
  • 1 tsp mirin = 11 calories (0g protein, 0g fat, 2g carb)
  • Salt & Pepper
  • 2 tsp soy sauce
  • 1/3 cup water
  • 1 egg (size 5) – 58 calories (4.55g protein, 4.4g fat, 0.1g carb)

Total breakdown: 750.95 calories (64.12g protein, 37.93g fat, 37.56 carb)

Directions:

  1. In a mixing bowl, season the ground beef to taste with salt and pepper.
  2. Heat a small amount of oil in a saute pan and cook the onion until tender.
  3. In a small bowl, beat eggs lightly. Add milk and mix well.
  4. Stir in the panko and put them off to the side.
  5. Now, add the onions and panko to ground beef and mix together with your hands.
  6. You should be able to make three to four good sized patties. Make sure to toss them back and forth and try to get as much air out as possible.
  7. Shape the patties into an oval and leave a thumb-print in the center (this allows for more even cooking).
  8. After you have your patties, heat a small amount of oil in the saute pan and cook your burgers. You can cover the pan and simmer on medium-high heat until the burgers finish cooking. After the burgers have cooked, remove the lid and reduce the heat to small-medium and cook until the water evaporates.
  9. Remove your patties from the pan.
  10. Add 2/3 cup water, ketchup, sake, Worcestershire sauce, soy sauce, and butter to the saute pan and bring to a boil.
  11. Simmer until thickened.
  12. Now, spoon the sauce over your burgers on plate and you’re done! 🙂

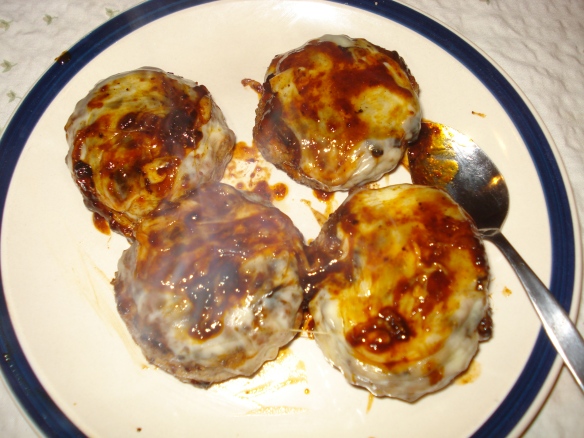
You can also melt cheese on top to make cheese-hambaagus, but make sure to add those macros in yourselves! 😉

Image

(Excuse the poor presentation as the above was one of my earlier attempts 🙂 )

Rest Day Recipes – Homemade Yogurt!

I’m sure I’m not the only person who enjoys a big bowl of cereal with a huge serving of yogurt for a late night snack. There’s on small problem – yogurt can be so darn expensive! Especially at the rate I go through them.

Why pay $1 for one tiny thing of Chobani yogurt, or even $4 for a 500g tub of non-fat yogurt, when you can make a gallon (3.78 litres = 3780g) for the same price (and more diet-friendly macros!)?

What you will need:

  • 1 gallon low-fat milk ($2.99 at your local Cumberland Farms)
  • 1 Chobani plain, non-fat Greek yogurt ($1)

Directions (with pictures for your viewing pleasure!):

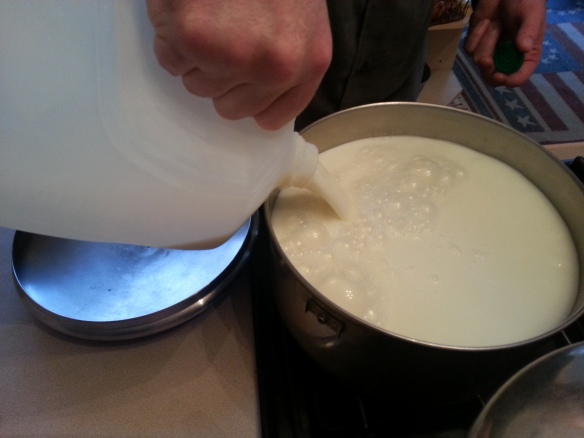
  1. Pour all the milk into a large saucepanImage 
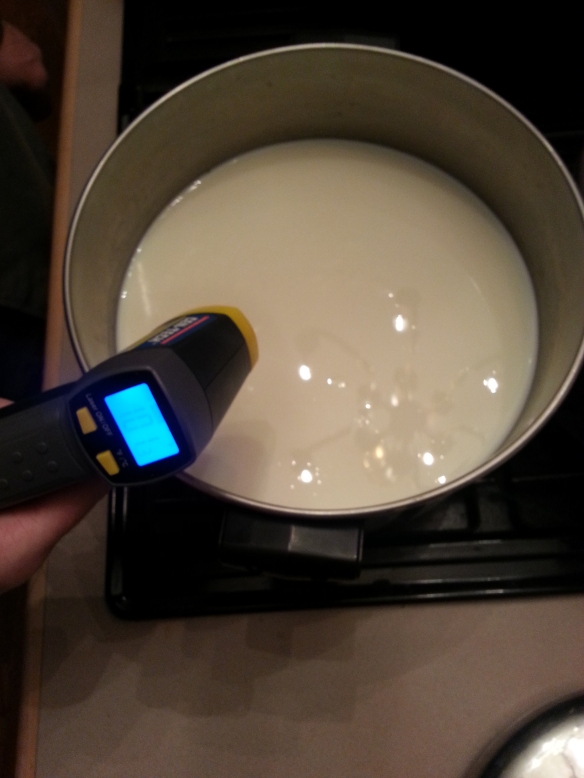
  2. Heat until the milk reaches between 104 – 112 F (40 – 44.4 C). If you don’t have a thermometer, you can try the “Pinky Test” or “Back of Hand Test”. The “Pink Test” is where you dip the end of your pinky into the milk and if it feels hot, it’s too hot, but if it feels warm, it’s okay. The “Back of Hand Test” is similar, but you take a teaspoon of the milk and drop it on the back of your hand.
    Image
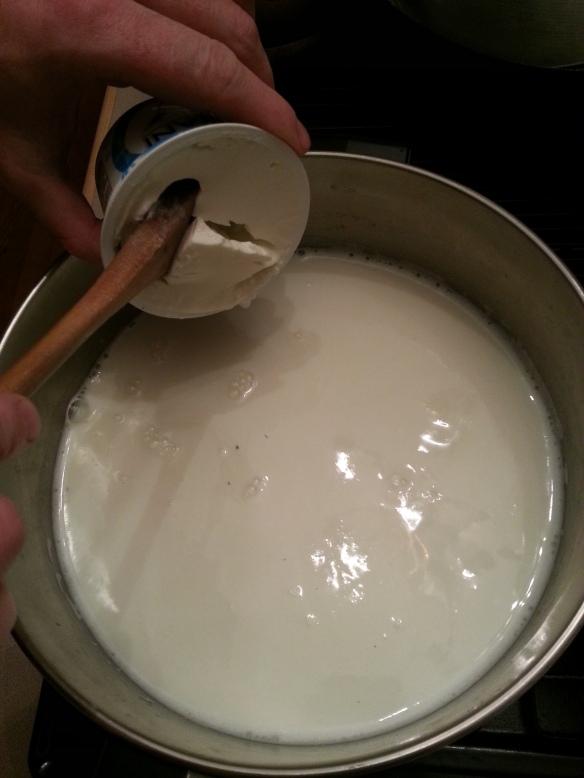
  3. Once desired temperature is reached, add the Chobani yogurt and stir well.
    Image
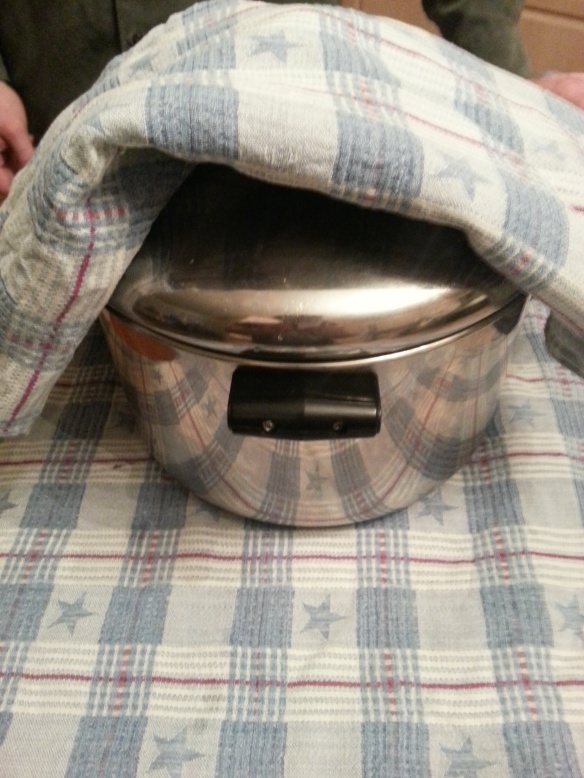
  4. Put the lid on the saucepan and cover with enough layers so that it doesn’t cool down too quickly. Ideally, the milk should stay around 104 F for about 4 hours.
    Image
  5. Leave it overnight and you should have a saucepan full of firm-yogurt 🙂

Note:

  • If the yogurt is runny, the most likely cause is that the temperature was wrong, so I highly recommend you invest in a thermometer.
  • Different kinds of yogurt will give you different tastes and may require different temperatures to harden well.
  • If you prefer “true” Greek yogurt (which is very thick), you can strain the yogurt through either a paper towel, or preferably, a cheesecloth. If you leave this long enough, you can actually make something which is the consistency of cream or cottage cheese, which can then be used to make very tasty dips for vegetables.

Rest Day Recipes – Healthy Pancakes! (& Abs!)

Image

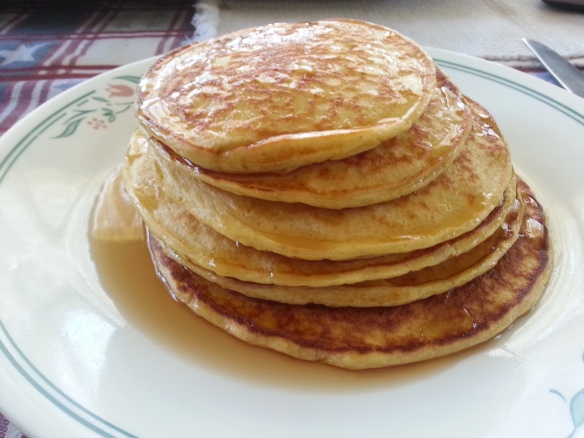
Pancakes are some of my favorite breakfast foods. Not only are they filling, but drenching them with maple syrup and stuffing your face in all their sugary glory is a phenomenal feeling.

Surely when trying to lose weight, pancakes should be the last thing a person should be eating, right? Especially with all those unwanted calories coming from the maple syrup and all…..

Not in my world!

This recipe yields three large pancakes. They’re not only high in protein, but they are filling and tasty. They may seem a bit flatter than your normal pancakes (almost crepe-like), but I assure you they taste quite good. And unlike many other “protein pancake” recipes you’ll find throughout WordPress, mine doesn’t require protein powder! 🙂

What you will need:

  • 4 large eggs – 280 calories, 24g protein, 0g carb, 16g fat
  • 1/2 cup (approx. 40g) oats – 155 calories, 5.7g protein, 22.4g carb, 3.7g fat
  • 1 cup (approx. 230g) low-fat cottage cheese – 160 calories, 26g protein, 12g carb, 0g fat
  • Vanilla essence – I use 2 tbsp

Now take the above ingredients, throw them all into a blender, and you’re good to go!

Total breakdown: 594.8 calories, 55.7g protein, 34.4g carb, 19.7g fat

So you get to have 3 large pancakes for less than 600 calories, and you get roughly 56 grams of protein (which is about 1/3 the amount of protein the average person here on WordPress should be getting in per day). Not a bad way to start off the day, right?

As you can tell from the picture above, I’m quite liberal with the amount of maple syrup I use (keep in mind that’s real maple syrup and none of that “0-calorie” stuff). I’ll generally give myself ~100-150 calories for the maple syrup. If you don’t want to waste your precious calories on syrup, you can get some calorie-free syrup from Walden Farms, etc.

Dieting is only as difficult as you make it. Just because you’re on a diet doesn’t mean you need to give up on your favorite foods and eat nothing but chicken, rice, oats, and broccoli day after day (though if you enjoy eating like that, more power to you!)

On a completely unrelated note, my abs are starting to come back! 😀

Image

(Yes, Instagram helps you look 10x better than you actually are LOL!)

Grilled Chicken Breast

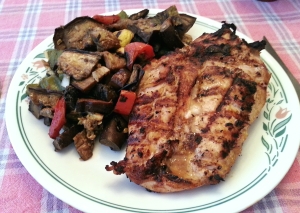
Grilled Chicken

In terms of protein to fat ratio, chicken breast is easily one of the most diet-friendly foods you can have. In 100 grams of chicken breast, there are 23.1g of protein, 0g of carbohydrates, and 1.2g of fat. That large meal pictured is low in calories, and high in nutrition. Sounds pretty diet-friendly to me!

When eating chicken breast, almost nothing is better than to grill it. Here is one of my favorite recipes.

Ingredients:

  • 400g chicken breast
  • 2 tsp fresh ginger or freshly grated ginger
  • 1 tsp fresh garlic or freshly grated garlic
  • 2 tbsp soy sauce
  • 2 tbsp Sake
  • 1 tsp sesame oil

Preparation:

  • Cover the chicken in plastic wrap and beat it with a rolling pin until it’s about 1cm or 1/2 inch thick. Trim off any excess bits.
  • Add all the flavorings and roll the chicken around to mix them together.
  • Leave it to marinate for at least 4 hours.

Instructions:

  • Heat the grill to about 450°F (232°C), coat the grill with vegetable oil spray, and wait until it stops smoking.
  • Place the chicken onto the grill and let it cook for 4-6 minutes or until it has browned.
  • Turn the chicken over and do the same on the other side.
  • Now, turn the grill down to a medium heat (300°F or 149°C), rotate the chicken 90 degrees and let it cook for another 2-4 minutes.
  • Turn the chicken and let it cook on the other side for another 2-4 minutes or until it has fully cooked.

To tell if something is “cooked”, I usually use the “firmness test”, which is when I pick up the chicken with tongs and if it is firm enough to not bend, it’s about ready. You can also cut into the meat to be sure (note: it’s okay for the chicken to be slightly pink). Of course, if you can afford a quality meat thermometer, all the better!

I hope you all have a wonderful Easter.